Help!, Instructions
CYA Tests – Testing Tips!
A client recently had an excellent question, they wondered if we had any photos that demonstrate the disappearing logo in our CYA tests. So now, we do!
They wanted a better idea of when exactly the dot has disappeared versus just being hard to see. The CYA test is incredibly subjective and also can be very fussy about light conditions. You could run all of our other tests in a dark cupboard with a candle if you wanted to and they’d still give perfect results (but please don’t try that, well ventilated areas only please!) However the CYA test works best if you follow some simple steps and set up the right conditions for the test.
Here’s a refresher on the steps for our CYA test, with my highlights bolded.
- Rinse the CYA mixing tube with pool water.
- Fill the CYA mixing tube with pool water to the mark indicated. Allow the water to come to room temperature if pool is cold.
- Fill the CYA mixing tube to the mark indicated with CYA Detection Reagent.
- Mix the CYA mixing tube thoroughly for 30 seconds.
- Find a well lit position. Hold the CYA viewing tube at waist level and, looking down into the tube, slowly pour the contents of the mixing tube in until the logo at the base of the tube disappears. Alternatively, use the included droppers to control the dispensing rate until the logo disappears.
- Look at the scale on the side of the CYA viewing tube. The water level on this scale indicates your CYA level.
Step 4 is important! Give the reagent and the CYA about thirty seconds of mixing (stirred or shaken, we’re not James Bond) to allow the CYA to bond to the test and become visible. CYA is slower to dissolve than other chemicals, so it needs a little gentle coaxing to show itself.
Step 5 is shown in the photos below. For the best result, we like the dot in our tube to disappear, but not by adding too much liquid. Advice online can range from “when it’s just disappeared” to “fully disappeared”. The only consensus seems to be that if you can see the logo, put another drop in.
Standing with your back to the sun, so the tube is at waist height in your shadow, is the best way to standardise this test. We are very big on standardised, repeatable, replicable tests here at Clear Choice Labs, so that the only thing changing is your pool water!
If the sun is down when you test, find the strongest artificial light you can find, and using the standard, gauge how the dot disappears under those conditions. Then recreate those lighting conditions when ever you test.
Click on the pictures below to get a bigger image.
 |
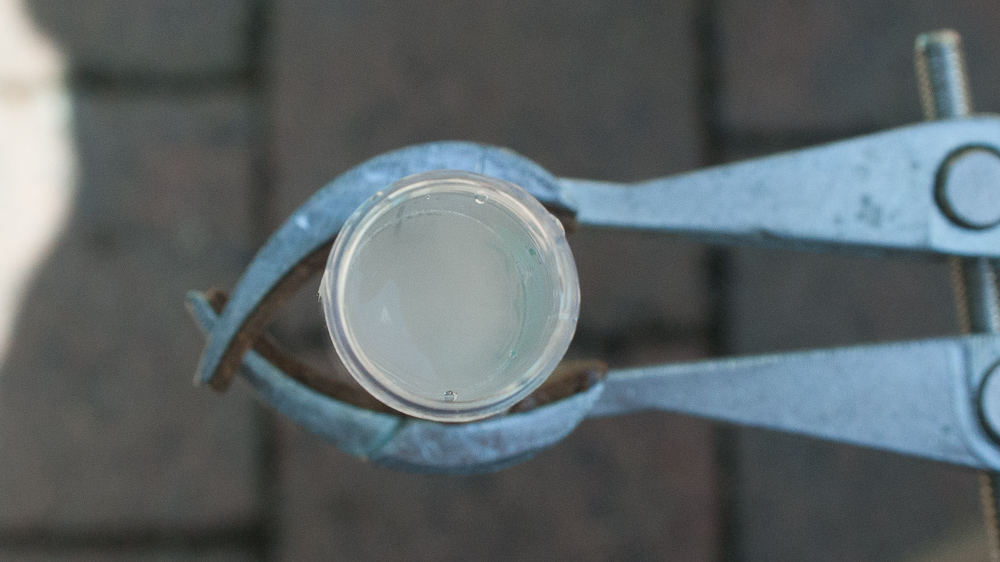
This is Stage One, where some of the mixture is in, but the logo is very clearly visible at the bottom of the tube. You can discern the outline, see the thicker black base of the logo, etc. |
 |
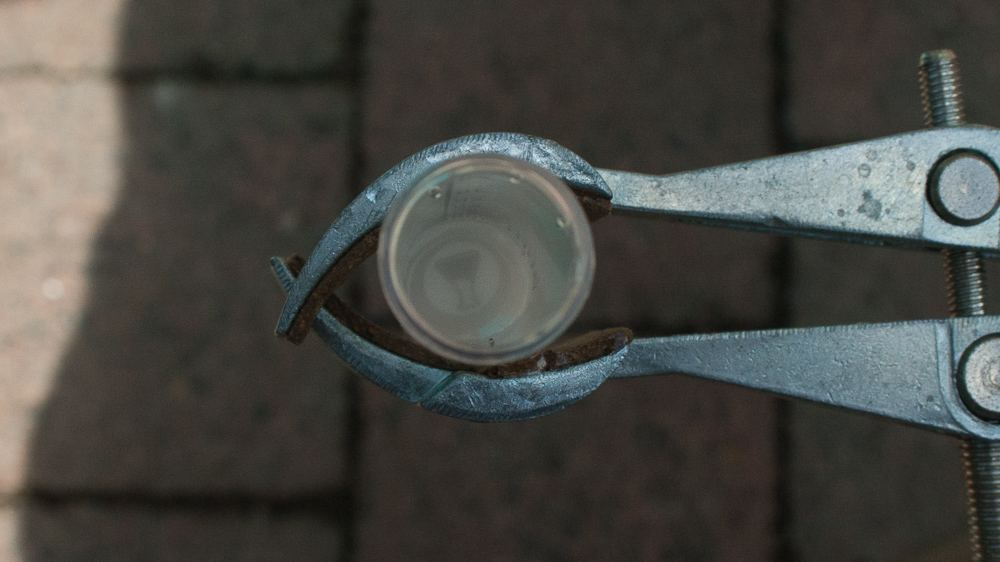
This is Stage Two, where we are getting close to the end amount. At this point, you can still see the logo but the outline is blurring, and it’s harder to make out the shape. From this point, we probably have only a millilitre of mixture to go before the end point of the test Slowly add more mixture a few drops at a time. Don’t over focus on the dot to force it to appear. Try looking away from the tube for a moment and then back. If when you look back the logo is clearly visible, add more liquid. Use the included pipettes to put very small amounts in at a time. |
|
|
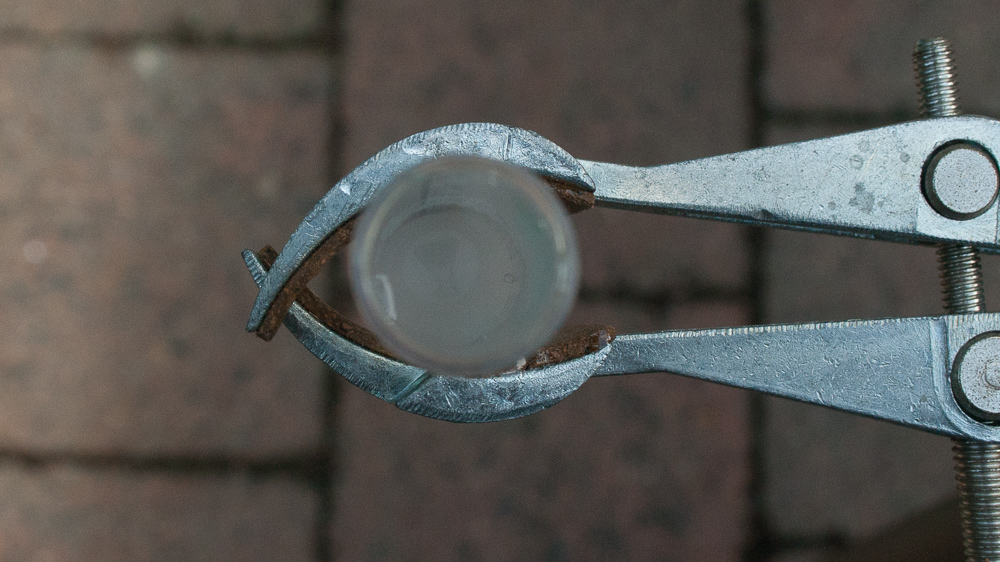
This is the final reading. The logo has disappeared in the clouded mixture. With the method of glancing away and not forcing the dot into focus, you’ll have better results as you get more practiced at stopping as the dot disappears. Putting too many drops in will skew your results. Use our included Standard to help you get an idea of what the test looks like in your personal environment, with your sunlight and background. (For the keen eyed amongst you, my end point today is about 40ppm as I have been experimenting with standards. I know some of you would have noticed and picked me up on it :) This is why you’re such great people to work for!) |
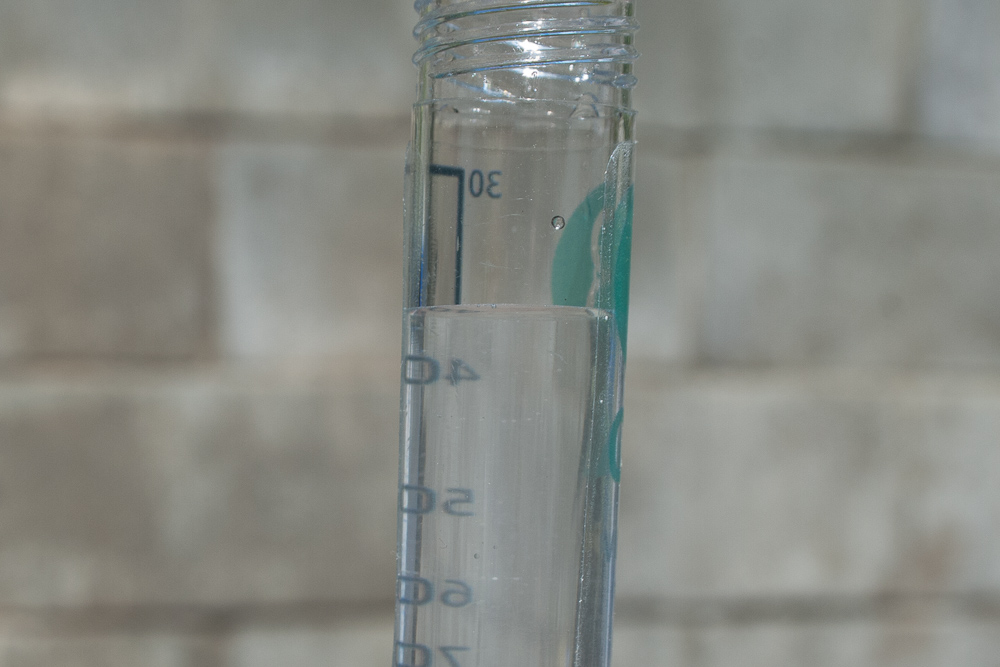 |
Even with the tube nearly full, the label is still clearly visible through the side of the tube. The logo would definitely be clouded over by this point, however the shorter path through the side of the liquid demonstrates in part how the test works. The more CYA+reagent you are looking through, the more cloudy and less clear the mixture becomes. |